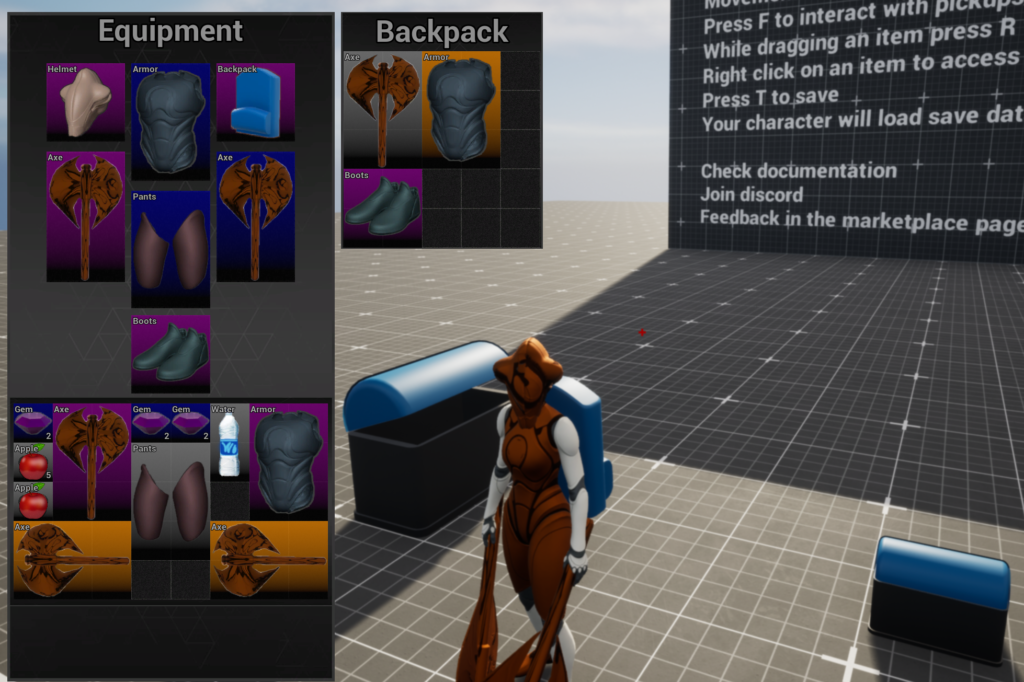
In this page you will find an overview of what this system is all about and how to work with it.
Inventory and pickup system 2.0 is the new update reworked from scratch to allow the user to have a seamless experience. Let’s have a look at some of the features:
- You choose your inventory layout, if you want to make a shooter or RPG style you can.
- Easy to add to any project, all the logic is handled in components.
- Optimized, data assets and soft references will ensure your project is as light as it can get.
- Good old inventory style or jigsaw style you decide.
- Replicated and multiplayer ready, the inventory replication is event based so it should be very optimized.
Check it out in Unreal Engine marketplace
https://www.unrealengine.com/marketplace/pickup-and-inventory-system
Quick Video Demo
Project requirements
The project is an asset pack so you will need to add it to your project, once that done there are 2 things you need to setup and one optional.
1. Gameplay tags
Go to project settings and add DT_InventoryTags to your gameplay tag data tables.

2. Data asset
Add the inventory data asset to the asset manager in project settings
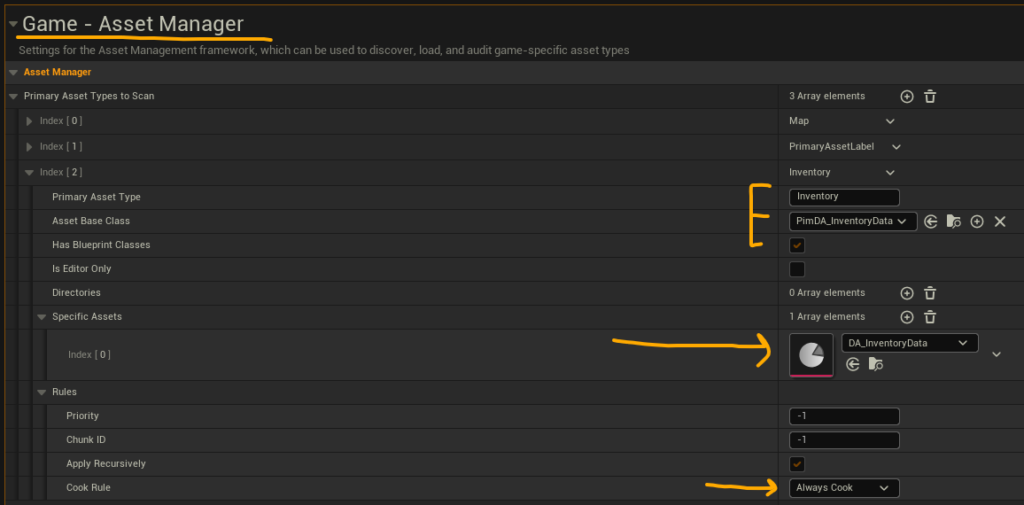
3. This is optional but if you want to test the demo make sure enhanced inputs plugin is enabled and use it in input settings. This is likely already enabled if using a recent engine version.
Let’s have a look at how the demo is setup
Looking at how the demo is setup is a good way to understand how to setup or modify the system. After this overview I will have a video for you to follow for how to do all this from scratch.
Let’s have a look at UI
The demo inventory inherits from UI_BaseInventoryClass this is the inventory UI base class, it contains certain functions used to communicate with the inventory component.
UI_Container is what you need to make equipment slots and multi slot inventory.
UI_Fixed slot is what UI_Container uses to form a grid
UI_Item is used to create items to add to UI_Container, these items can be dragged and moved around.
UI_DragVisual is used for the drag and drop visual, it also handles rotating slots when pressing R
UI_ContextMenu used for context menu
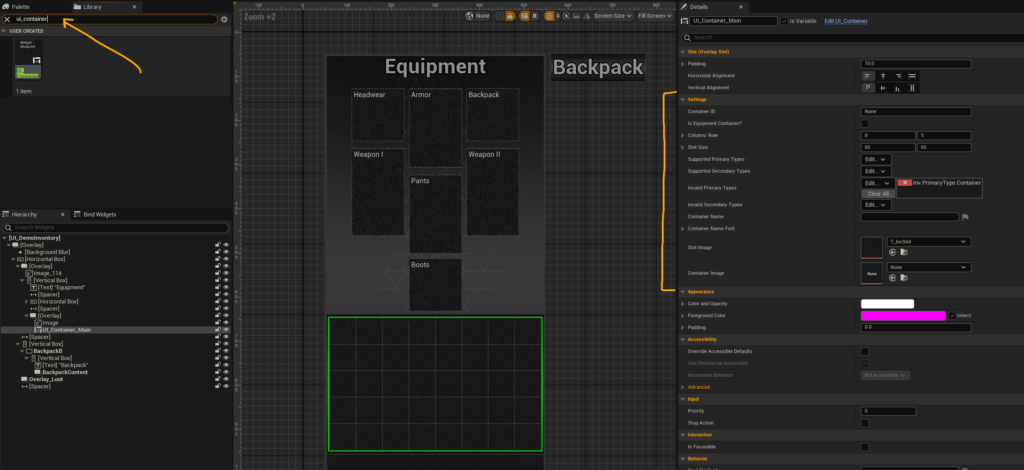
Looking at the demo inventory this container is a normal container, UI_Container can be added from the palette, once added it’s time to indicate whether this is a regular container or an equipment container, the one below is regular container meaning it has multiple slots so Is Equipment has to remain false. Column/Row is 8/5 and we restrict adding backpacks, the primary and secondary types can be used to restrict certain item types from being compatible.
So that was a regular container, this one is an equipment container so first Is Equipment Container? has to be true, the column/row don’t matter but we can leave it as 1/1. We can change the shape of the container by indicating the slot size, in this case it’s 120/200.
We’re restricting the primary type to be weapons by indicating the gameplay tag Inv.PrimaryType.Weapon
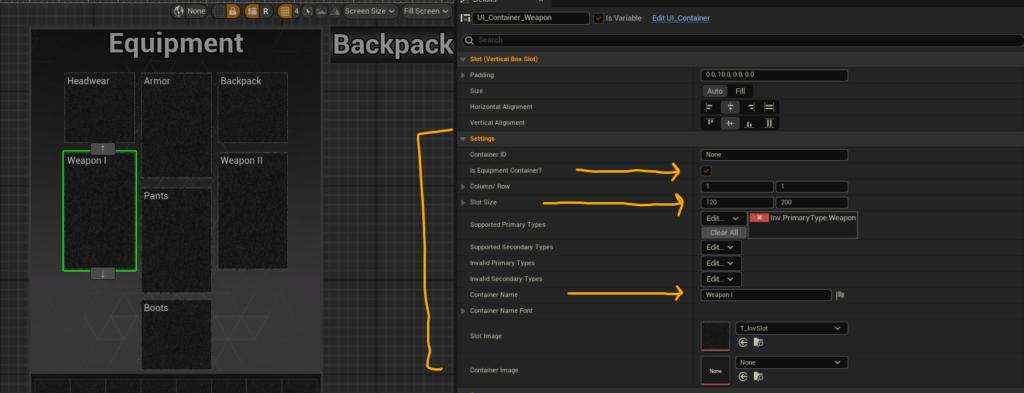
Creating your inventory widget is as simple as adding UI_Containers and changing the settings.
In the demo I have a backpack slot, this backpack is in itself is a container so we need a way to know that the backpack was equipped so we can show its content. Since our inventory widget inherits from UI_BaseInventoryClass we have access to those events.
Here I’m using On item added and on item removed, and check if the container matches by backpack container and go from there. The GetContent function will return the content widget, this widget is indicated in the inventory data asset.

Once you have all your inventory slots done there’s one important function to handle and it’s used to return the list of containers, you might need to override it if working with a fresh widget
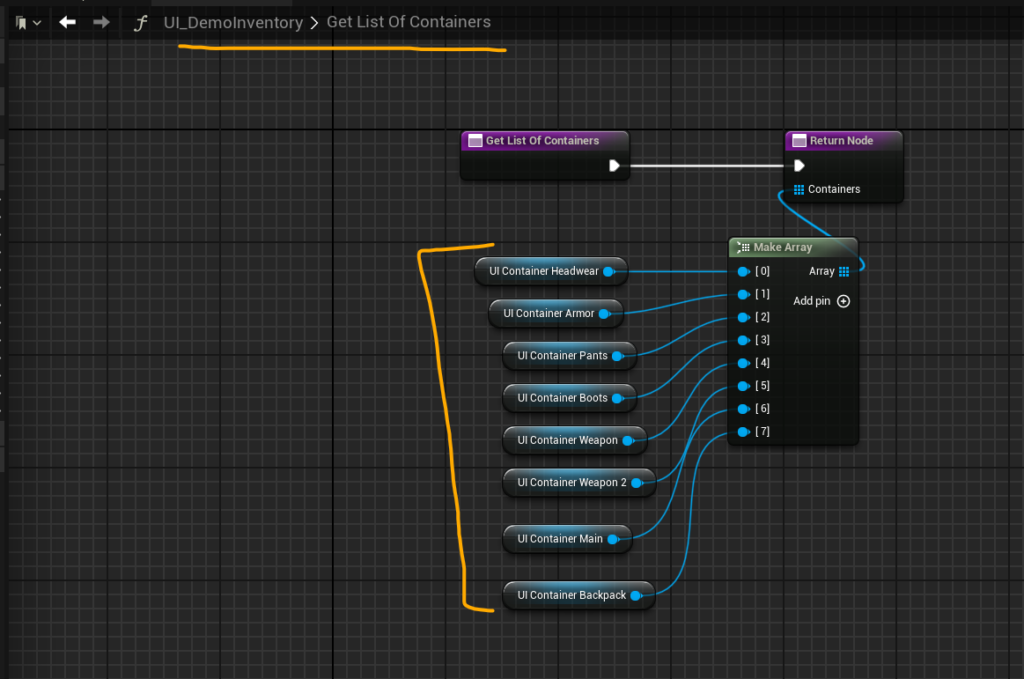
Once your inventory UI is ready we can move to the Inventory Component.
This system can be divided into 3 sections, The inventory UI, the inventory component and the pickup system.
The inventory component can be added to your player character or controller, in the demo I have it added to the character.
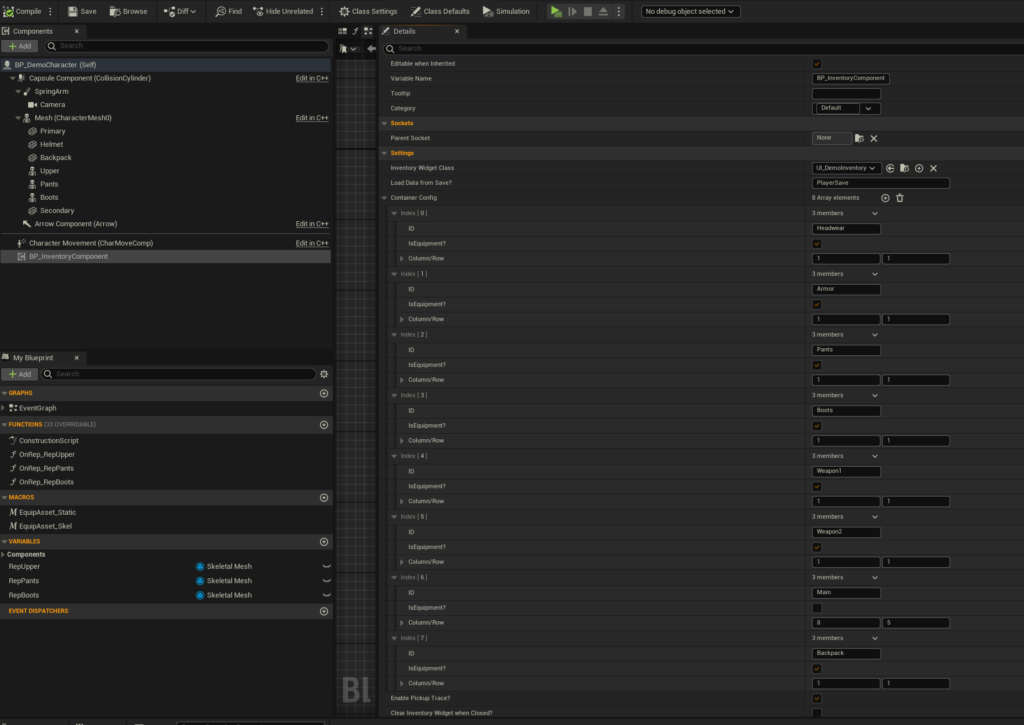
The first thing we want to do is indicate the inventory widget class which in my case is UI_DemoInventory.
Next is the container config, this has to match the inventory widget layout, this config is mainly used by the server. You can see below I added all my slots and indicated if it’s an equipment slot or not and the column/row.
The settings also include starting items and whether to trace for pickups or not, this should be true for the player and false for loot containers since the inventory component is also used by loot containers. Feel free to check my demo settings to get an idea.
Pickup system
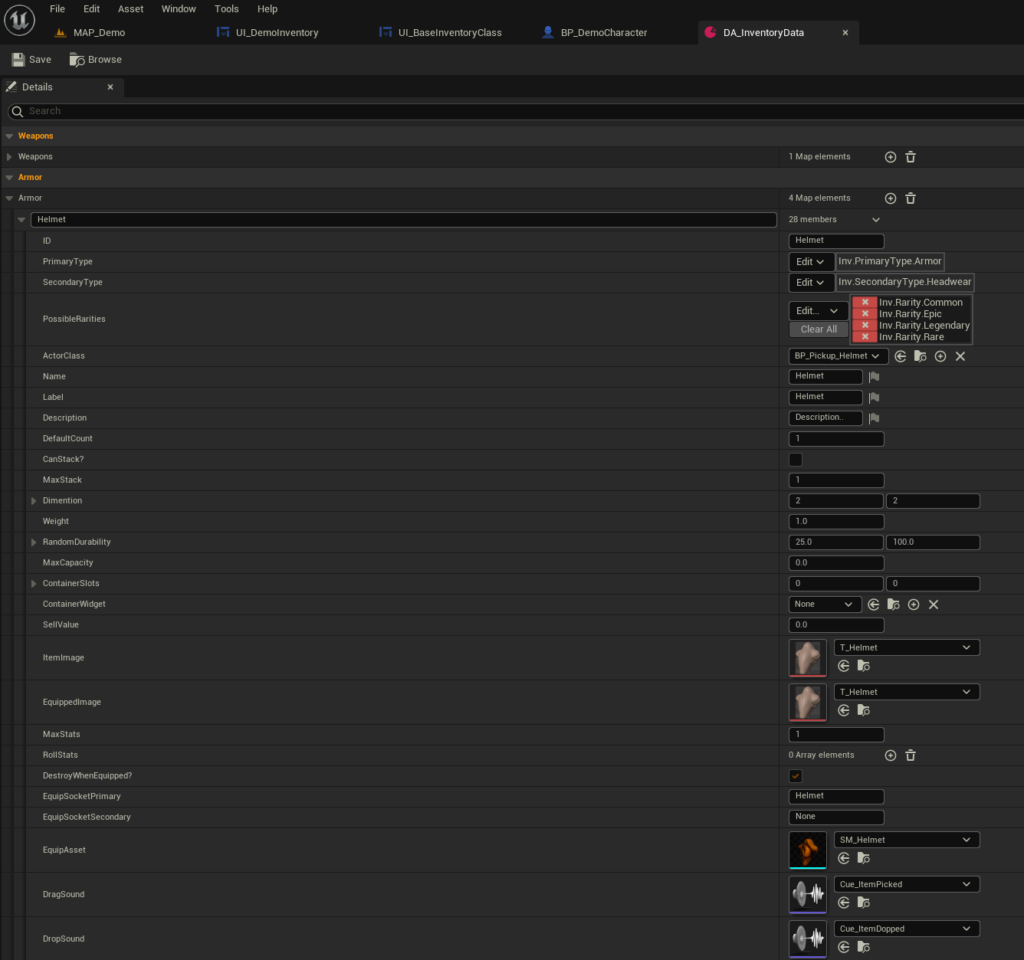
The inventory data is stored in a data asset called DA_InventoryData here you can setup all your items, there are a few categories setup for you but you can also extend the data asset and add more.
The pickup class is very simple, all we need is the pickup component added to your base class and create child classes out of it and simply select the pickup component and indicate the item ID which is taken from our inventory data asset. The Beginplay bind you see in the image is called when we’re looking at the item in this case I’m using it to show a 2D widget for the item name.

Loot Container
The loot container is identical to the way you would setup your own character, it also uses the inventory component, the widget class is also based off of UI_BaseInventoryClass so you can customize a loot container in interesting ways for example multiple interesting slots.
The event graph only contains the interaction bind like the pickup BP. Similar to the character you can also indicate random loot starting items with spawn chance, count and rarity.

The save system
The save system is vey straight forward, if you indicate a save name then when the game starts the data will be loaded from that save name, you can also indicate an auto save interval. You can also save manually, in the demo you can press T. The inventory component has Save and load function at your disposal.

